Service Mode on GUD27 Stacked Laundry

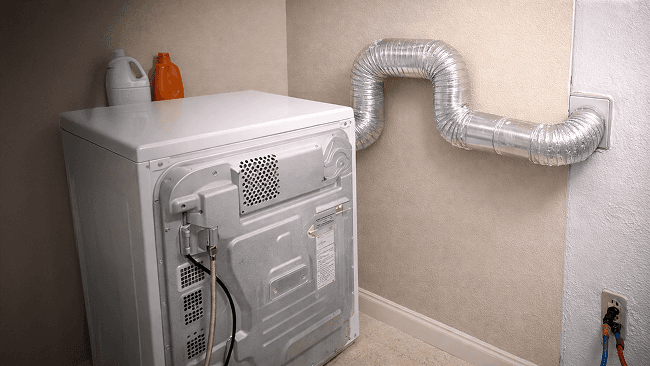
And that is the stacked washer dryer. Okay? This is the stacked laundry pair, the GUD 27 ESS. Now, this particular one, okay. Very popular across property management. This one, I'm gonna show you how to get into the field service mode and how to access the fault coats, and of course, how to activate individual components.
Now, the first thing you need to know about this is the sequence, right there is really no key code sequence here because it doesn't have many pads to press this particular one. What you're gonna need to do is. Rotate that knob, that that cycle cycle knob, you're gonna have to rotate it. But the first thing you do is you press and hold the start key.
So press and hold the start key, then you rotate it 180 degrees. And once you do that, all the LEDs are going to blink. Now once the LEDs blink, that means that you are in service mode. And in this particular, with this particular machine, there are going to be a total of 16 functions available. So in this particular case, there are 16 functions, and once you're in service mode, you're gonna rotate the knob.
One more click to go to the different functions. The first one that we're gonna talk about is the faults. So that's function number one. Now. The way that you're gonna read these functions is gonna be in a format called binary, okay? And binary code is a bunch of ones and zeros. Okay? Just if you ever watch those movies from the seventies and they have those computer rooms and lights flashing all over the place, that's binary.
Okay? But in this case, binary is gonna help you to understand which fault code you have. So let's go ahead and take a look at that. So the status over here on the control panel, it's gonna have a set of five LEDs. So the lid, lock, spin, rinse, wash, and on, and depending on which one of those is blinking will in, that'll be indicative of which fault code you have.
So if the lid lock, LED is blinking, look at the legend. X means it's blinking, blank means it's off. So this one's blinking right? If the lid lock LED is blinking, you are in fault code number one. If the spin LED is blinking, you have fault code number two. If both the spin and the lid lock, LED are blinking, you have full code number three, so on and so forth.
Now, what do these fault codes mean if we advance over here? Full code number one. Is your lock monitor. Okay, so your lid lock didn't, didn't lock or didn't send signal. So there's a problem with the lid lock, let's say fault code number five, right? So that's two LEDs that are blink, that are blinking. The control didn't see the transition from agitate to spin or vice versa.
So in other words, the unit. Can't spin, can't agitate. Now again, my friends, for time purposes, I put together a quick video here to show you exactly how this is done because we actually went to a property recently in, I believe it's St. Louis, Missouri, and I was able to demonstrate to some of the property maintenance technicians out there how to get into the service mode for this particular machine.
So let's go ahead and show that, that clip right here, 'cause I think it's something that you're gonna find quite useful. So let's go to the video tape.
Alright, so we're gonna put this unit into the test mode. So the first thing is hold down the star key. Turn this jog, dial 180 degrees, and then let go of the star key.
When we let go, all the LEDs are going to begin to flash. So there they are. This means we are in test mode. Now we're gonna go to function number one, so we can pull up our fault coats. And to do that we're gonna rotate this knob to the medium or one, one turn clockwise. And now we have binary code. One, which is function number one, which is our fault codes.
So now if we want to find the faults that are in this machine, we have to hit the start key. And in this case, because the lights are flashing in this pattern, this is an indication that we don't have any fault in this machine. So that's good. Now we're gonna go to function number eight, I believe, which is the hot water valve.
So we're gonna turn this knob. So this is function number two. This is function number 3, 4, 5, 6, 7, 8. So now the wash, LED indicates that we're in function number eight, which is gonna be of course our hot water valve. So if we hit the star key, we will get the hot water to operate and there's a hot water valve that's running, and we're gonna go ahead and kill it by hitting the star key.
And now we're going to activate the cold water valve. And to do that we're gonna hit. We're gonna go to the next function, which is function number nine. So eight plus one is nine, and we're gonna hit the star key. And this activates the cold water valve. With that said, we are gonna drain the water mill.
So we're gonna hit the star key again, and we're gonna go to test number 11. So this is test number 10, and this is test number 11, eight plus two plus one. So eight plus two plus one is test number 11. When gonna hit the start key, the water will be drained out. So we're gonna go ahead and hit start. Okay.
Follow us. Over here. You can see that the water is draining from that hose, and that is essentially how we would activate the different functions. We're gonna kill that, how we would activate the different functions of this.